Repertorization
Repertorization is a process of adding symptoms to the case and assigning them a specific grade of importance in the overall case.
Adding symptoms to repertorization
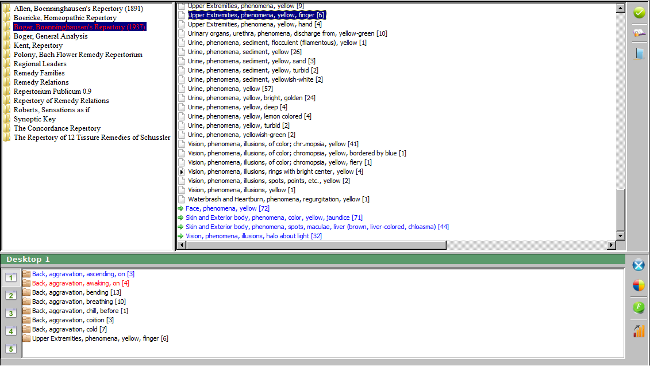
To add symptoms in the repertorization, simply Drag the symptoms from the list of symptoms in the repertory into the case repertorization section. Alternatively you can select the symptom you wish to add and either press the ENTER key, or the F4 key, or click the Add selected symptoms to repertorization button.
Deleting symptoms from repertorization
 To delete a symptom from the repertorization, select it and either press the DELETE or F5 key, Drag it back into the repertory, or click the Delete selected symptoms from the repertorization button.
Merging symptoms
Merging symptoms allows to combine two or more symptoms into a new symptom. This is done usually for very similar symptoms in which it is impossible to find a clear distinction. To perform this, select two or more symptoms in the repertorization and either click the Merge symptoms in repertorization button, or press the F7 key. To reverse the merge operation, simply select the merged symptoms and click the Merge symptoms in repertorization again.
Filters
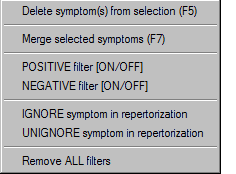
All the filters can be activated either by clicking the Repertorization filters button, or right-clicking one or more symptoms in the repertorization.
Positive filter applied to a symptom means, that only the remedies in the symptom will be displayed in the repertorization.
Negative filter applied to a symptom means, that the remedies in the symptom will be deleted from the repertorization.
To turn off the positive and negative filters, simply select the symptoms with positive / negative filters and click the positive / negative filter button again.
Ignore / Unignore symptom in repertorization applied to a symptom means, the ignored symptom will be disregarded in the repertorization. Unignoring a symptom will return in back into the repertorization evaluation.
Remove all filters removes all filters from the repertorization and returns all symptom grades to default.
Symptom grades and evaluation
Symptom grades allow the homeopath to set which symptoms are more important in the repertorization and which symptoms are less important. To set a symptom grade, right-click any selected symptoms in the repertorization and select the correct symptom grade.
The calculation of the repertorization score is based on the symptom grade, remedy grade and the maximum grade of the repertory.
Score = [Symptom Grade] * [Remedy Grade] / [Maximum Repertory Grade]. This symptom allows in this manner correctly repertorizing using the multiple repertories using multiple grades. Boenninghausen's repertory for example uses 5 grades, while Boger's General Analysis uses only 2 grades. To allow for a correct evaluation, in Boenninghasen's Repertory, the Remedy Grade 1 would have the value 1/5 = 0.25 and Remedy Grade 2 has the value 2/5 = 0.4.
In order not to confuse the different grading systems, they are in repertorization marked as relative by their strength, so for example when mixing the symptoms from Kent's Repertory (3 different grades, 1/3 = 0.33, 2/3 = 0.66 and 3/3 = 1) and Boenninghausen's Repertory (5 different grades, 1/5 = 0.25, 2/5 = 0.4, 3/5 = 0.6, 4/5 = 0.8, 5/5 = 1), we arrive at 7 different grades in repertorization (0.33, 0.66, 0.25, 0.4, 0.6, 0.8, 1).
Repertorization desktops
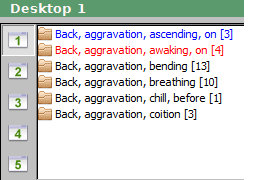
OpenRep SYNOPSIS allows you to use up to 5 different repertorization desktops. Repertorization desktop allows for a separate repertorization, so that you can work-out different aspects of the case within different desktops.
To select a single desktop, click the respective desktop icon. To select multiple desktops, press and hold the CTRL key and click on any desktops you wish to have selected at the same time.
When selecting more than one desktop, only those symptoms will be displayed, that are located in all the selected desktop. It also means, that if multiple desktops are selected, deleting a symptom will delete it from all the selected desktops. Adding a symptom to multiple selected desktops will add it to all of the selected desktops.
Right-clicking on a desktop icon displays the menu allowing to:
- Rename the desktop
- Delete all the contents of the desktop
To copy the symptoms from one desktop to another, either drag the selected symptoms onto the repertorization desktop icon, or press the CTRL+C key shortcut, click the desired desktop icon and press the CTRL+V key shortcut. Please note, that dragging the symptoms will move the symptoms into the other repertorization desktop. To copy the symptoms, press and hold the CTRL key while dragging. Alternatively, you can select symptoms you wish to copy or move, right-click them and select the Copy / Move symptom(s) to repertorization desktops.
Analyzing repertorization results
To analyze the repertorization details, click the Display full repertorization details button. This opens the Repertorization results dialog.
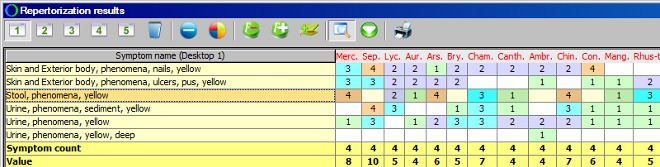
The Repertorization results dialog contains all the functionality of the repertorization section of the main screen, so it is possible to apply filters, change symptom grades, merge and unmerge symptoms, etc. This functionality can be accessed either by right-clicking the symptom or by selecting the symptom and clicking the respective button on the toolbar. Please note, that any changes performed in this dialog will be automatically reflected into the current repertorization opened in the main screen.
Additional functionality of the Repertorization results dialog rests on the capability to view and analyze side-by-side multiple repertorization desktops. To view multiple repertorization results contained in different desktops, simply click the repertorization desktop button you wish to see and it will be added to the repertorization results. To combine all the results into one table, select the desktops for which the combined results should be displayed and click the Display repertorization for ALL the selected desktops COMBINED. Please note, that when displaying several repertorization results, when hovering with a mouse on a remedy shortcut, the same remedy is highlighted in other tables as well, so it is easier to compare the remedy results.
The Set variable column widths allows to either equalize all the columns in the repertorization results table, or use the minimum column width for each column to see as many remedies as possible.
By clicking the Sort button, it is possible to sort the repertorization results by the remedy name, occurence count or the value.
The repertorization results can be finally printed-out to a printer or into a PDF file by clicking the Print Repertorization Results button.
Exploring the remedies
OpenRep SYNOPSIS integration allows to study remedies and remedy relations straight in the repertory without the need of external programs. To access this capability, simply right-click the remedy shortcut anywhere in the program.
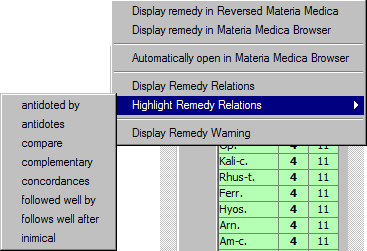
This opens the popup menu that allows to:
- Display remedy in Materia Medica Browser
- Display remedy in Reversed Materia Medica
- Display remedy relations for the specified remedy
- Highlight specified remedy relations in the repertorization results
- Display general warnings about the specified remedy